How to show weather-based dynamic product recommendations in Klaviyo
Imagine your customers receiving emails that automatically showcase summer dresses when it's sunny and warm, but switch to showing raincoats and boots when storms are forecast. With Weather for Email and Klaviyo's product recommendation system, you can create dynamic product feeds that automatically adapt to each customer's local weather conditions.
This guide will show you how to set up weather-responsive product recommendations that change based on real-time weather data, creating a personalised shopping experience that matches what your customers actually need.
Understanding the Setup
The Strategy: Instead of manually selecting products for your emails, you'll create multiple weather-specific product feeds in Klaviyo and use conditional logic to display the right feed based on each customer's weather conditions.
What You'll Need:
- Weather for Email integrated with Klaviyo
- Product catalog synced to Klaviyo (Shopify, WooCommerce, Custom Catalog etc.)
- Products properly categorised which will allow you to identify them by weather/season
- A email template from Klaviyo's drag-and-drop editor
Step 1: Organise Your Product Catalog
Before creating weather-based feeds, ensure your products are properly categorised for weather conditions in your e-commerce platform (Shopify, WooCommerce, etc.). Klaviyo uses the existing categories from your synced product catalog - you cannot add new categories directly in Klaviyo.
Audit Your Current E-commerce Categories: Review your existing category structure and reorganise if needed to support weather-based targeting.
Instead of broad categories like:
Jackets(too general)Tops(too broad)Shoes(not weather-specific)
Try create weather-specific categories such as:
- Warm Weather:
Summer Tops,Shorts,Sundresses,Sandals,Swimwear - Cold Weather:
Winter Coats,Heavy Sweaters,Winter Boots,Thermal Wear - Rainy Weather:
Rain Jackets,Waterproof Boots,Umbrellas,Rain Pants - Transitional:
Light Jackets,Cardigans,Layering Pieces - Seasonal Accessories:
Sun Hats,Winter Scarves,Waterproof Bags
Important: After reorganising categories in your e-commerce platform, allow time for the updated catalog to sync to Klaviyo before creating your weather-based product feeds.
Step 2: Create Weather-Specific Product Feeds
Navigate to Content > Products > Product Feeds in Klaviyo and create separate feeds for each weather scenario.
Feed 1: Warm & Sunny Weather Feed
Feed Name: warm_sunny_products
Configuration:
- Primary Sort: "Best-selling products (90 days)" (you can change this if you wish)
- Category Includes: Warm Weather, Summer, Swimwear etc..
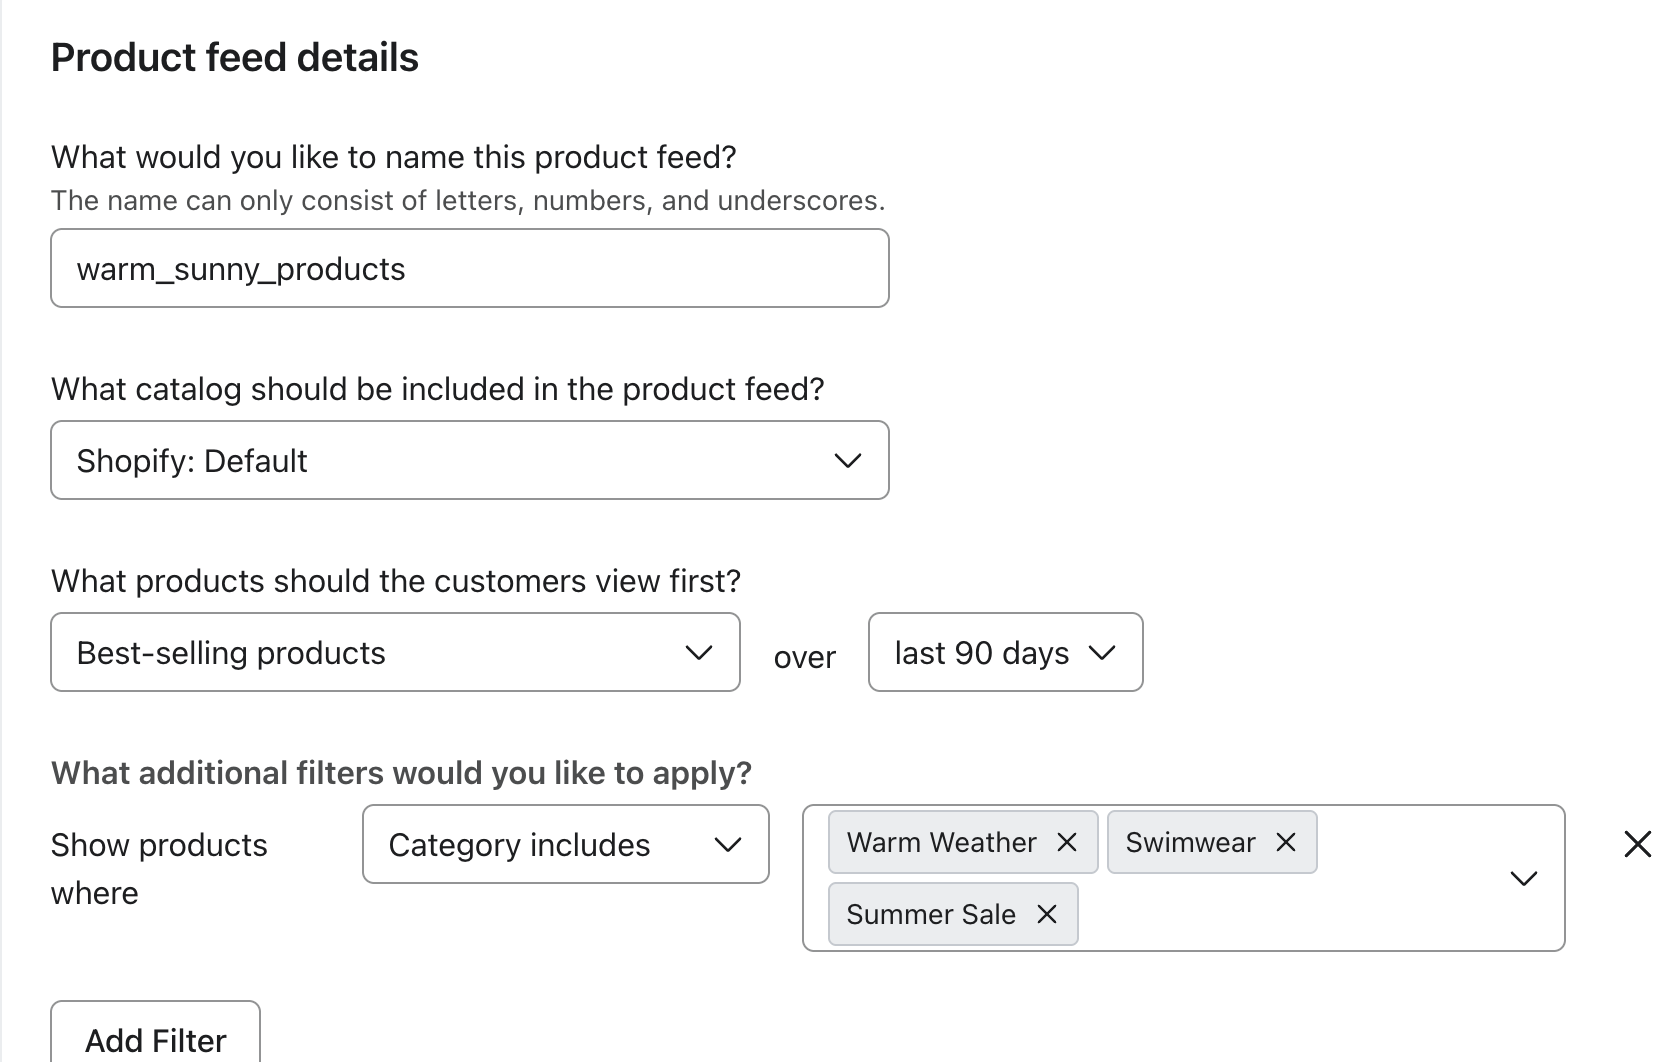
Example warm and sunny product feed
Feel free to add any other filters like price or stock level as appropriate. You can also exclude categories too.
Repeat this process for the rest of the product feeds
Feed 2: Cold Weather Feed
Feed Name: cold_weather_products
Configuration:
- Primary Sort: "Best-selling products (90 days)" (you can change this if you wish)
- Category Includes: Cold Weather, Winter, Outerwear etc..
Feed 3: Rainy Weather Feed
Feed Name: rainy_weather_products
Configuration:
- Primary Sort: "Best-selling products (90 days)" (you can change this if you wish)
- Category Includes: Rain Gear, Waterproof, Umbrellas
- Category Excludes: Swimwear, Sandals
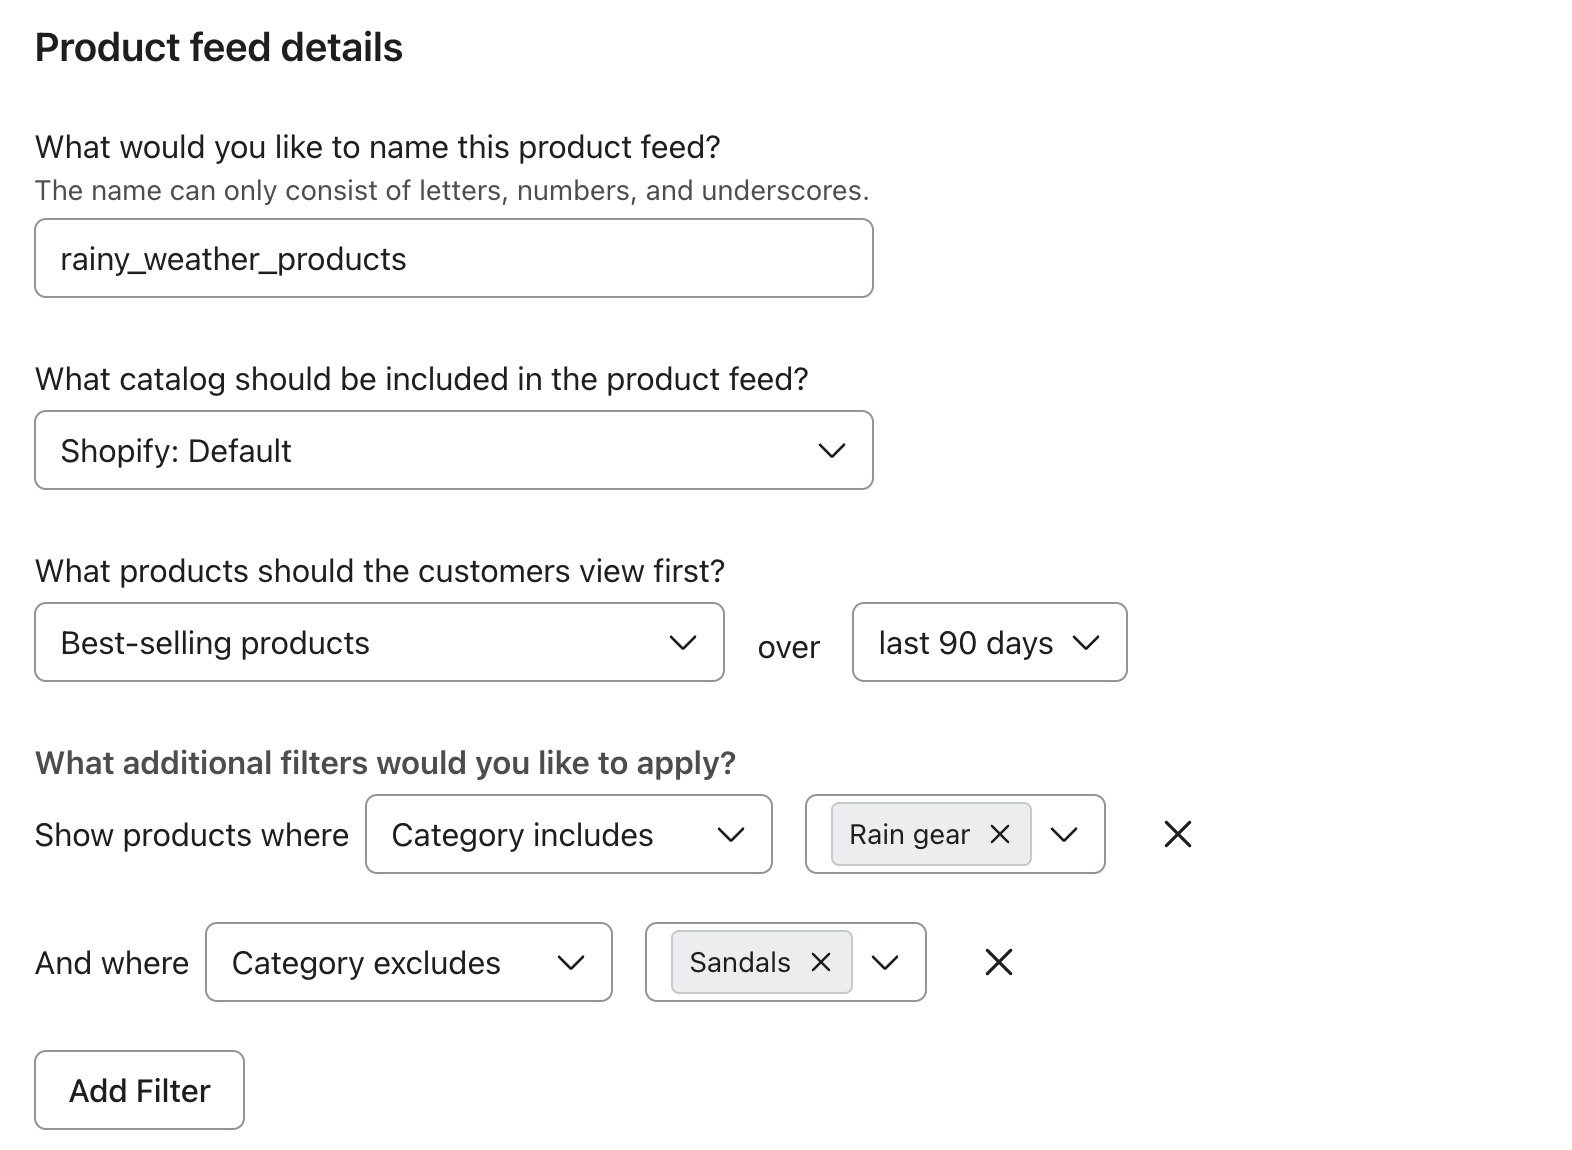
An example using the "excludes" rule
Feed 4: Mild/Transitional Weather Feed
Feed Name: mild_weather_products
Configuration:
- Primary Sort: "Best-selling products (90 days)" (you can change this if you wish)
- Category Includes: Transitional, Light Jackets, Versatile
Step 3: Create Conditional Product Blocks
Now you'll use Klaviyo's conditional logic to display different product feeds based on weather data.
Setting Up the Conditional Logic
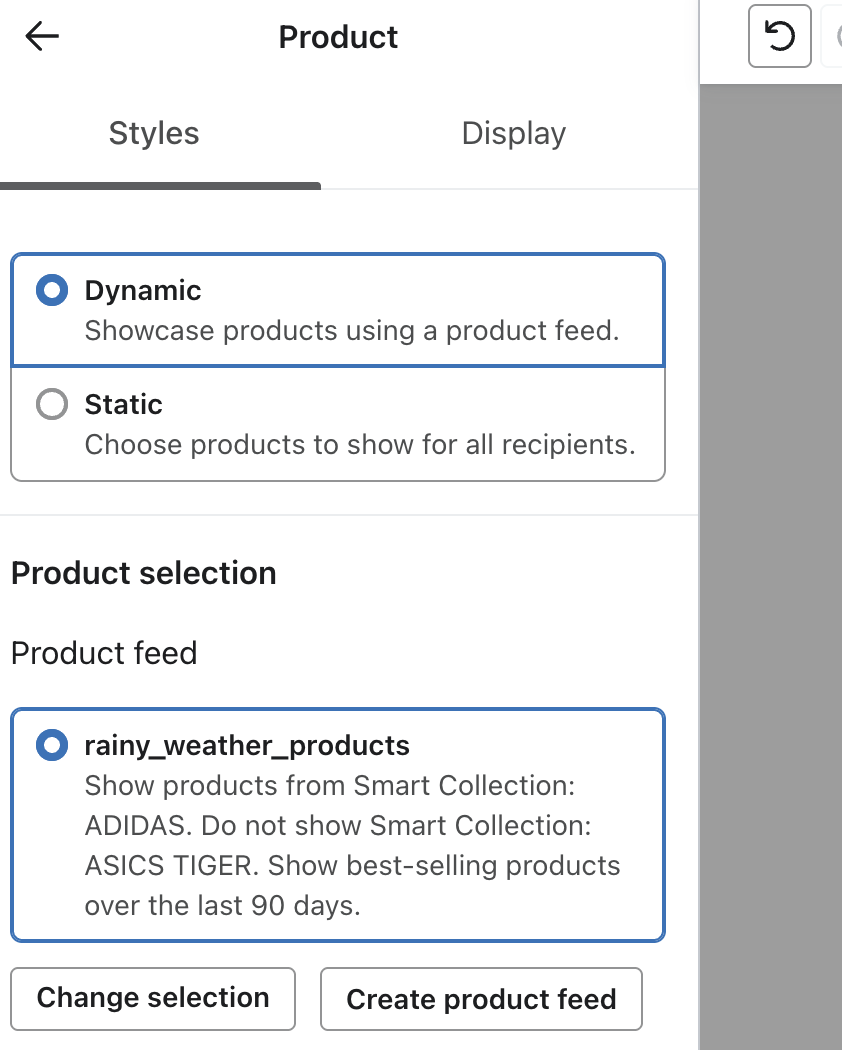
In your email template, drag a Product Block into your email template for each product feed you created. In our example that means we will add 4 product blocks into the template. Don't worry, only 1 will show to the user when the email is sent
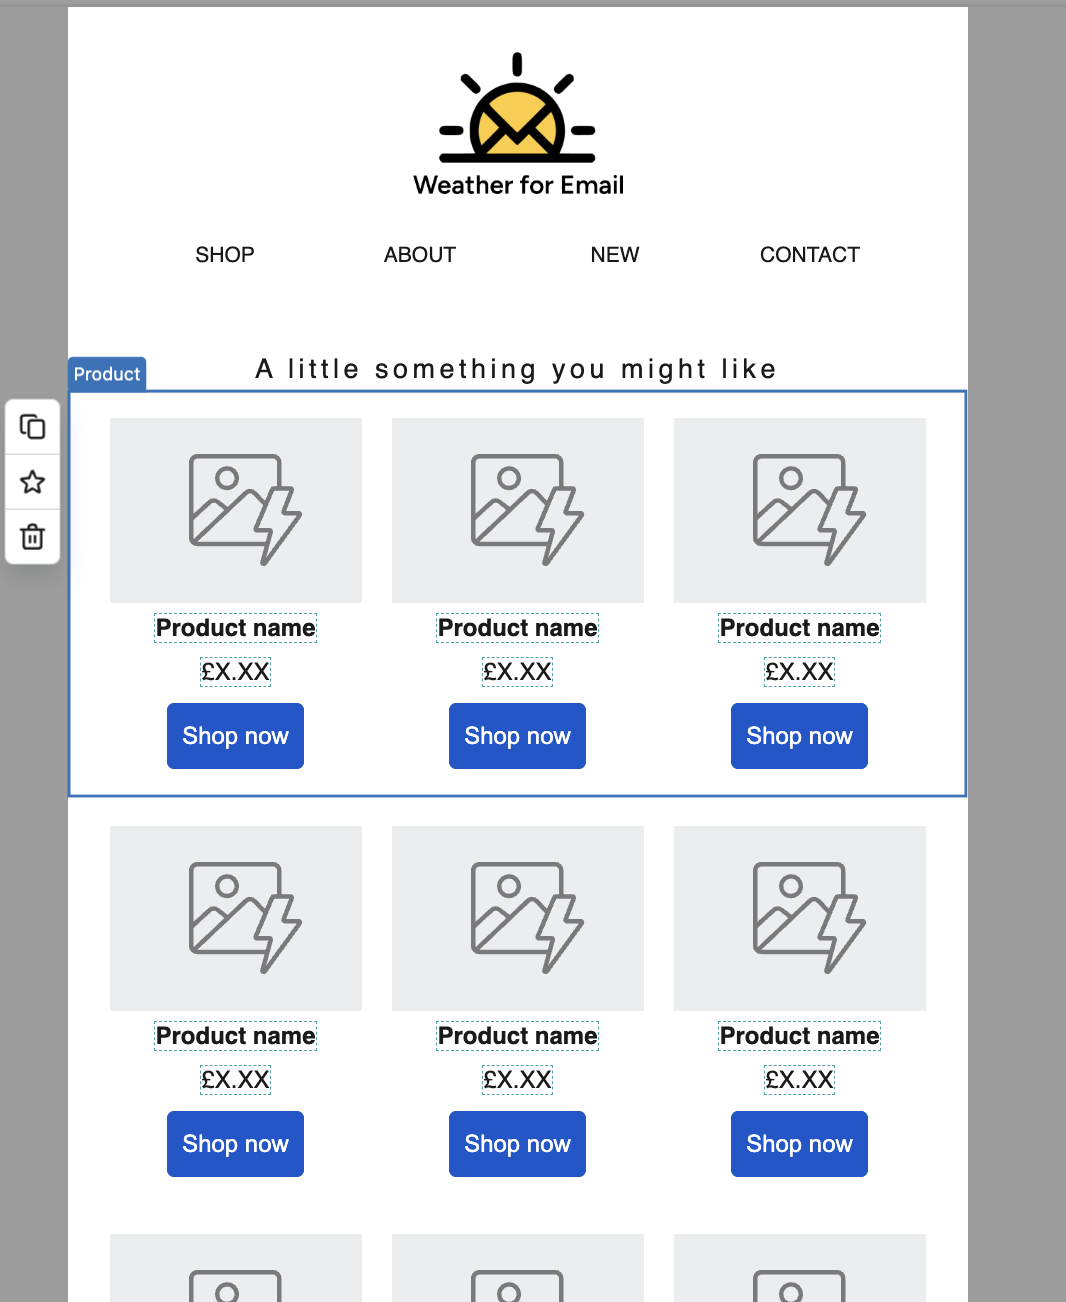
Add all your product feeds to the email template
Now we will add in the dynamic weather logic to ensure the correct product blocks show for the right profiles.
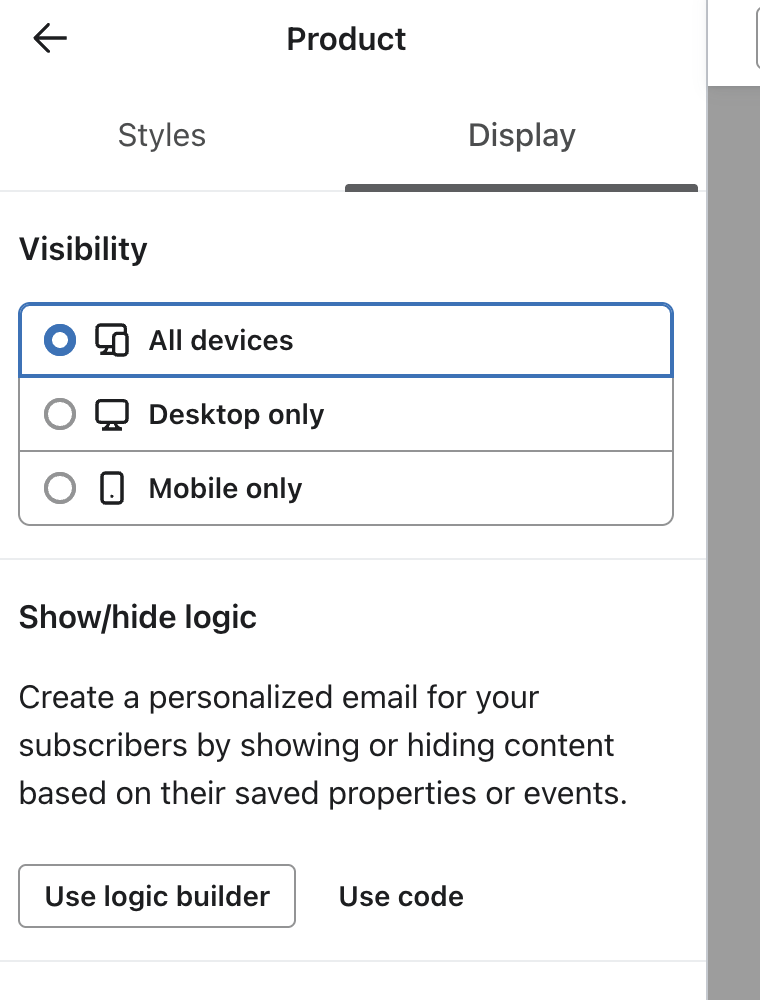
Click on "Display" in the settings for the first product block
Select "Display"
Then under "Show/hide logic" click on the Use Logic Builder button
The "Display" logic
Here is where we can now add in the conditions which will determine when the product block will appear. In this example we are using the rules wfe_forecast_chance_of_rain is greater than 70 AND wfe_forecast_conditions contains the text "Rain"
You can use as many different profile properties as you like to make sure the logic is exactly what you want. Find the full list of weather profile properties here
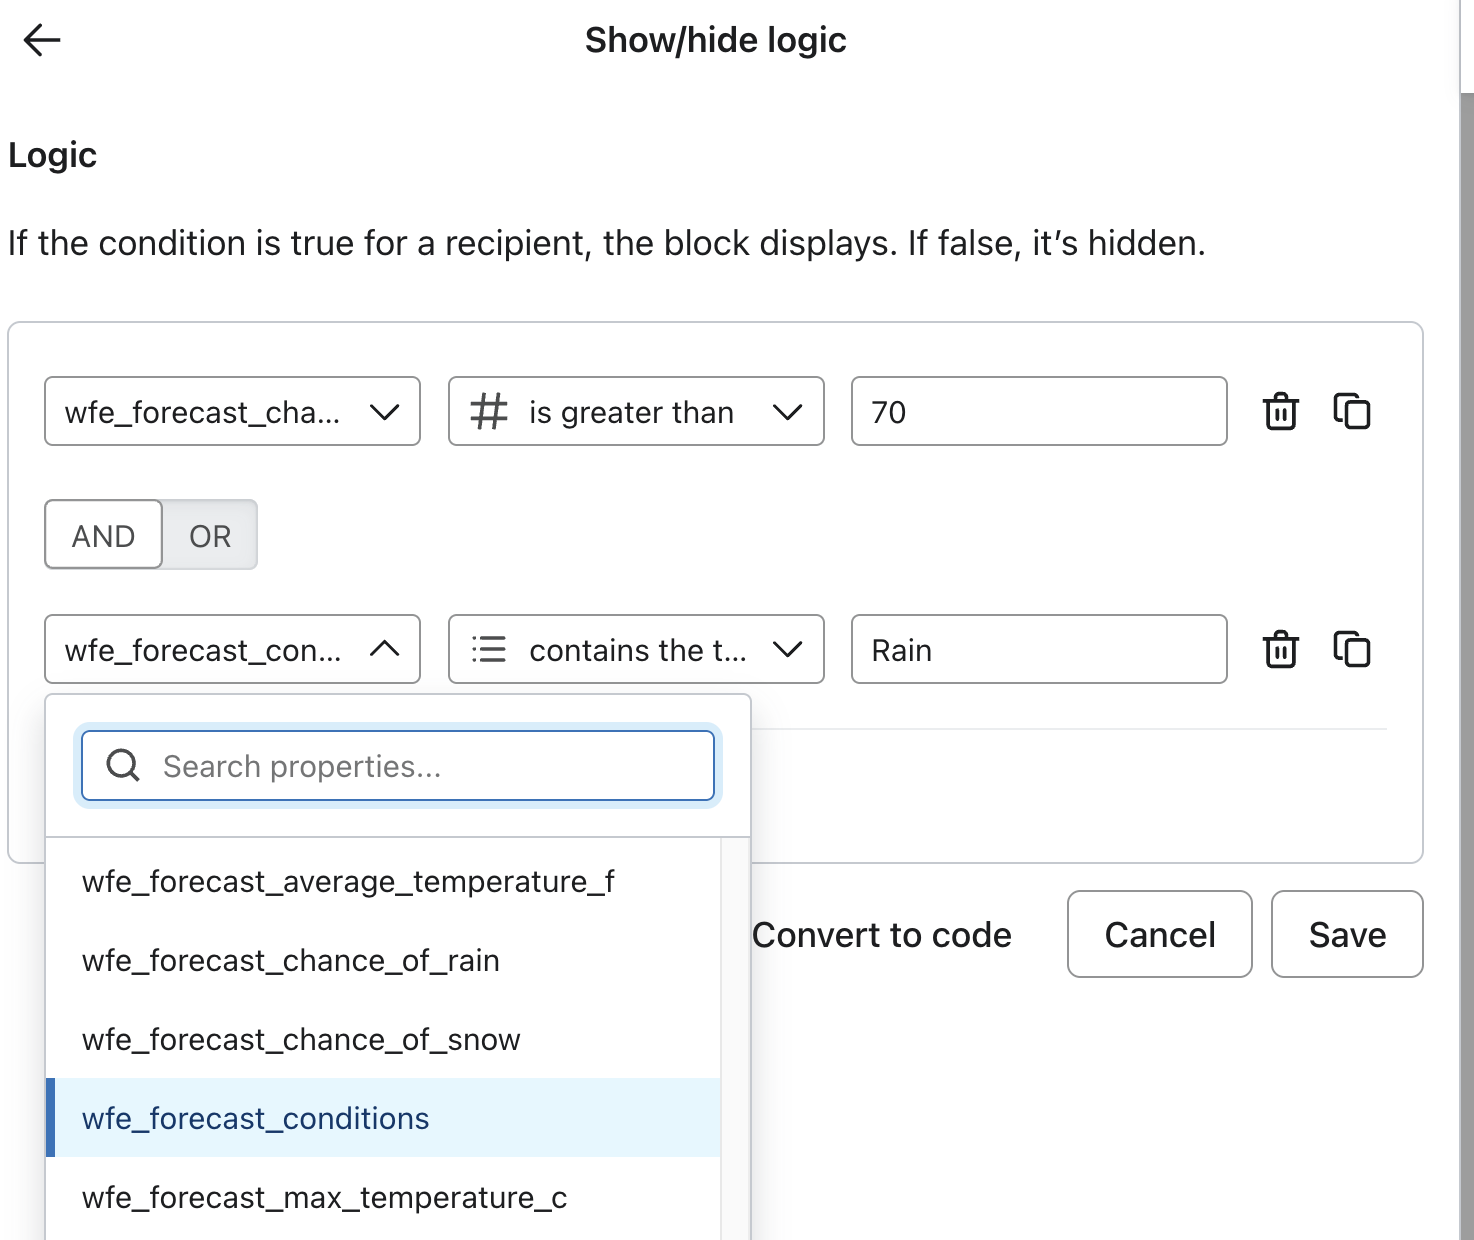
Logic for wet weather product block
Save your rules, and then repeat this process for each of the different product blocks in your email and test with a few different profiles.
Make sure your dynamic rules are set in such a way so that a profile will only ever see one product block
Alternative code approach
If you are more comfortable coding your emails instead of using the drag/drop features, you could add some django templating code like below
<!-- Warm & Sunny Weather (25°C+ and Clear/Sunny) -->
{% if person.wfe_current_weather_temp_c >= 25 and person.wfe_current_weather_condition == 'Clear or Sunny' %}

    <h3>Perfect Weather for These Styles! ☀️</h3>
    <!-- Insert Warm Weather Product Block Here -->

<!-- Cold Weather (Below 10°C) -->
{% elif person.wfe_current_weather_temp_c <= 10 %}

    <h3>Stay Cozy in the Cold 🧥</h3>
    <!-- Insert Cold Weather Product Block Here -->

<!-- Rainy Conditions -->
{% elif 'Rain' in person.wfe_current_weather_condition %}

    <h3>Stay Dry in Style 🌧️</h3>
    <!-- Insert Rainy Weather Product Block Here -->

<!-- Mild/Default Weather -->
{% else %}

    <h3>Versatile Pieces for Any Day 👗</h3>
    <!-- Insert Mild Weather Product Block Here -->

{% endif %}
Some More Advanced Weather Conditions
Create more sophisticated weather-based recommendations using multiple weather properties, below are a few examples to help you get started
Hot Summer Day Logic
{% if person.wfe_current_weather_temp_c >= 28 and person.wfe_average_uv_index >= 7 %}
    <h3>Beat the Heat & UV Rays! 🌞</h3>
    <!-- Show: Swimwear, sun hats, sunglasses, UV protection clothing -->
Winter Storm Approaching
{% if person.wfe_temperature_trend == 'Much_Colder' and person.wfe_forecast_chance_of_snow >= 70 %}
    <h3>Winter Storm Ready ❄️</h3>
    <!-- Show: Heavy coats, boots, winter accessories -->
Transitional Weather
{% person.wfe_current_weather_temp_c > 10 and person.wfe_current_weather_temp_c < 25 %}
    <h3>Perfect Layering Weather 🍂</h3>
    <!-- Show: Cardigans, light jackets, versatile pieces -->
Step 5: Create Weather-Responsive Email Campaigns
Welcome Series Integration
Add weather-responsive product blocks to your welcome flow:
<h2>Hi {{person.first_name}}! Here's what's perfect for your weather:</h2>

<!-- Current conditions: {{person.wfe_current_weather_condition}} at {{person.wfe_current_weather_temp_c}}°C -->

{% if person.wfe_current_weather_temp_c >= 25 %}
    <p>With sunny {{person.wfe_current_weather_temp_c}}°C weather, these pieces are perfect for you:</p>
    <!-- Warm weather product feed -->
{% else %}
    <p>For {{person.wfe_current_weather_temp_c}}°C weather, stay comfortable with:</p>
    <!-- Cold/mild weather product feed -->
{% endif %}
Browse Abandonment with Weather Context
<h2>Still thinking about those items? Plus check these out for {{person.wfe_current_weather_condition|lower}} weather:</h2>

<!-- Show abandoned products first -->
<div><!-- Recently viewed items block --></div>

<!-- Then show weather-appropriate recommendations -->
{% if 'Rain' in person.wfe_current_weather_condition %}
    <h3>Since it's rainy, you might also need:</h3>
    <!-- Rainy weather product feed -->
{% endif %}
Best Practices for Weather-Based Product Recommendations
Product Feed Management
- Update categories regularly as new products arrive
- Monitor stock levels to ensure recommended items are available
- Seasonal feed rotation - deactivate winter feeds during summer months
- Price point consideration - match recommendations to weather urgency (rain gear might command premium pricing)
Email Design Tips
- Clear weather context - mention the weather condition that triggered the recommendation
- Urgency messaging - "Perfect for today's sunny weather" or "Don't get caught in tomorrow's rain"
- Fallback content - Always have a default recommendation for profiles without weather data
With weather-personalised product recommendations, your fashion e-commerce emails become genuinely helpful, showing customers exactly what they need for their current conditions. This creates a more personalised shopping experience that drives higher engagement and sales while building customer loyalty through relevant, timely product suggestions.
